Using Nebula to Build Secure Private Networks

In today’s interconnected world, establishing secure and efficient private networks is crucial for organizations and individuals alike. Traditional Virtual Private Networks (VPNs) often come with limitations such as complex configurations and scalability challenges.
Nebula, an open-source overlay networking tool designed to create scalable, secure, and high-performance private networks. Originally developed by Slack and later open-sourced, Nebula offers a flexible alternative to conventional VPN solutions.
Nebula is a peer-to-peer, layer 3 virtual network that facilitates encrypted communication between hosts across diverse environments, including cloud providers, data centers, and personal devices. It operates by creating an overlay network, allowing devices to communicate securely over existing networks without the need for traditional VPN setups. Key features of Nebula include:
• Peer-to-Peer Connectivity: Enables direct communication between nodes without relying on a central server.
• High Compatibility: Supports various operating systems such as Linux, macOS, Windows, iOS, and Android.
• Robust Security: Utilizes the Noise Protocol Framework for encryption and a Public Key Infrastructure (PKI) model for host authentication.
• Efficient NAT Traversal: Employs techniques like UDP hole punching to facilitate connections across Network Address Translation (NAT) devices.
Setting Up a Secure Private Network with Nebula
Building a secure private network using Nebula involves several key steps:
Download Nebula Binaries:
Obtain the appropriate Nebula binaries for your operating system from the official GitHub releases page. Ensure both nebula and nebula-cert binaries are downloaded.
Create a Certificate Authority (CA):
Nebula uses a PKI model where each host is authenticated using certificates. Begin by creating a CA, which will sign the certificates for all hosts in your network:
./nebula-cert ca -name "YourOrganization"This command generates ca.key and ca.crt files. Distribute the ca.crt to all hosts while keeping the ca.key secure and offline when not in use.
Generate Host Certificates:
For each host, generate a unique certificate and key:
./nebula-cert sign -name "hostname" -ip "192.168.100.1/24"Replace "hostname" with the host’s identifier and "192.168.100.1/24" with its assigned Nebula IP address.
Configure Nebula on Each Host:
Create a configuration file (config.yml) for each host, specifying details such as the host’s Nebula IP, paths to the certificate files, and firewall rules. A minimal configuration might include:
pki:
  ca: /etc/nebula/ca.crt
  cert: /etc/nebula/host.crt
  key: /etc/nebula/host.key

static_host_map:
  "192.168.100.1": ["lighthouse_public_ip:4242"]

lighthouse:
  am_lighthouse: true
  interval: 60

listen:
  host: 0.0.0.0
  port: 4242

firewall:
  outbound:
    - port: any
      proto: any
      host: any
Adjust the configuration according to your network requirements.
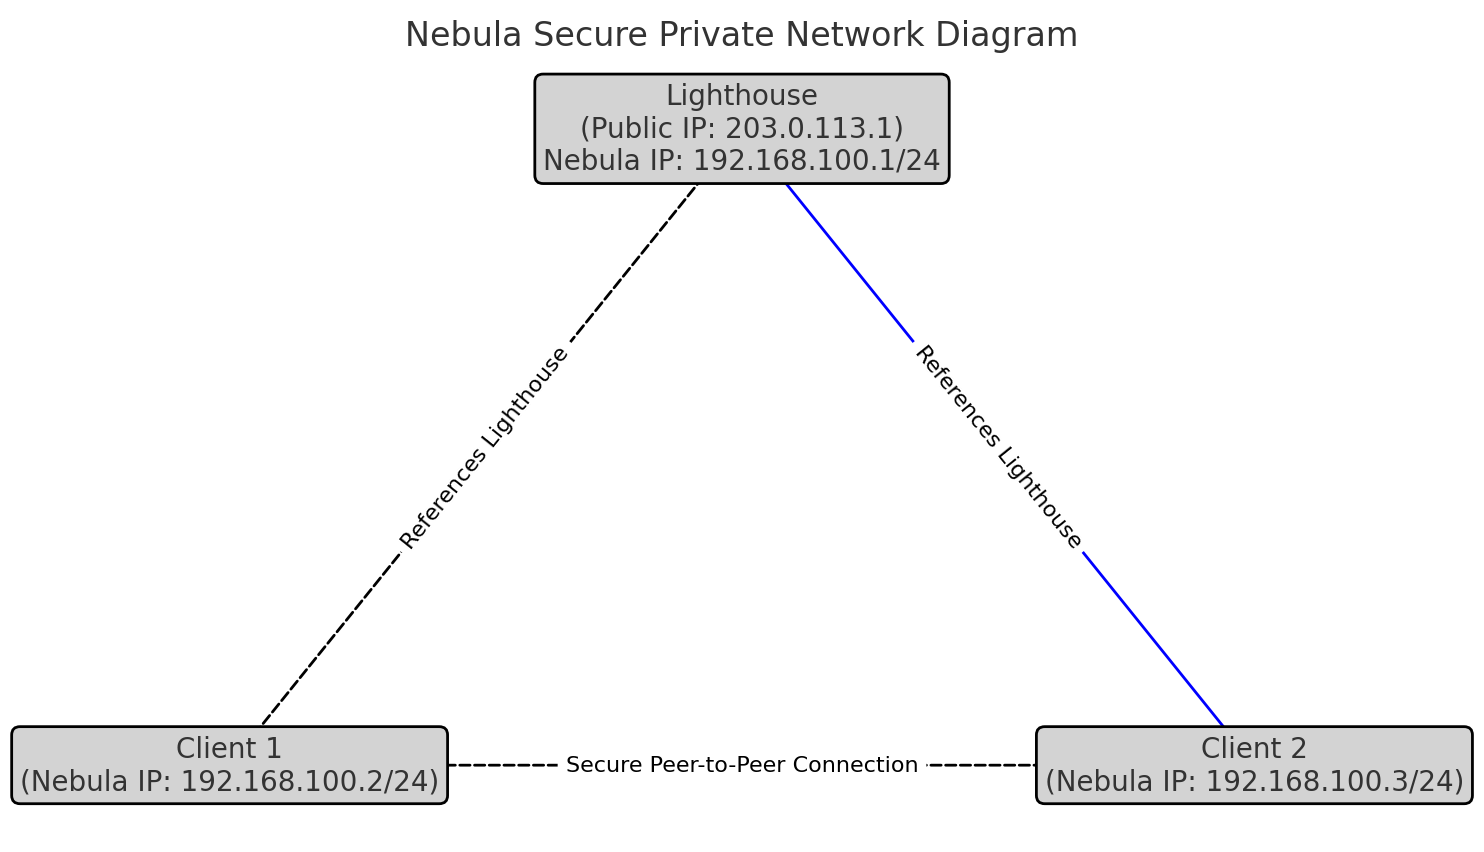
5. Establish Lighthouses:
Lighthouses are special nodes that assist in peer discovery. Designate at least one host with a static public IP as a lighthouse by setting am_lighthouse: true in its configuration. Other hosts should reference this lighthouse in their static_host_map.
On each host, start the Nebula service:
./nebula -config /etc/nebula/config.ymlFor production environments, consider setting up Nebula to run as a system service for better management and reliability.
For a comprehensive walkthrough, refer to Nebula’s Quick Start Guide.