Deploying WireGuard VPN with Ansible and Nginx for Secure Access

Introduction
WireGuard is a modern and lightweight VPN solution that excels in simplicity and security. In this article, we will guide you through deploying WireGuard on a VPN server using Ansible for automated configuration.
Additionally, we'll configure Nginx to allow access only to users connecting via the WireGuard VPN, with UFW (Uncomplicated Firewall) providing an extra layer of security.
How this should work?
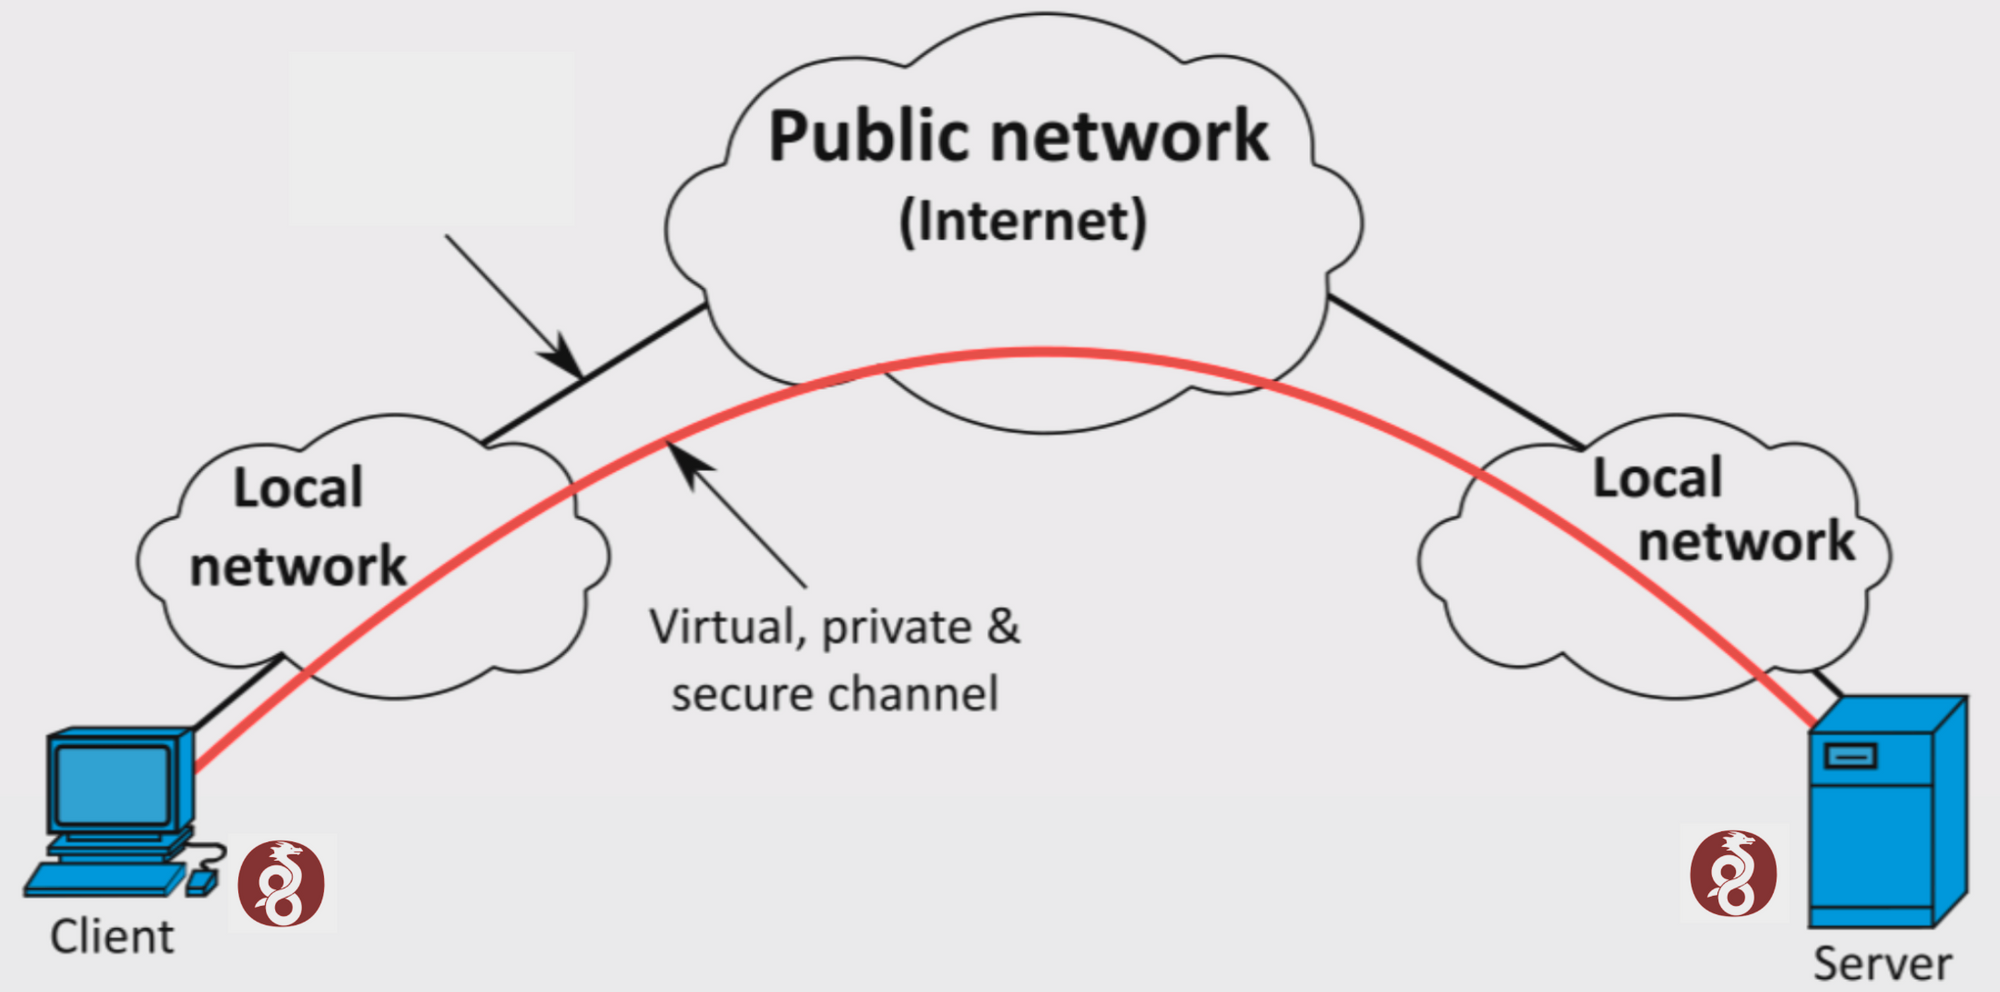
Client <——————————Wireguard Tunnel——————————>Web App
- The client should configure on his end (Wireguard tunnel) via the Wireguard app
- The private web server should be accessible only for clients are using Wireguard client(using the VPN client)
Step 1: Setting Up the VPN Server
1.1. Install WireGuard:
Start by installing WireGuard on your VPN server. WireGuard is available in the official Ubuntu repositories.
sudo apt update
sudo apt install wireguard
1.2. Generate WireGuard Keys:
Generate a key pair for the VPN server:
wg genkey | sudo tee /etc/wireguard/privatekey | wg pubkey | sudo tee /etc/wireguard/publickey
1.3. Create the WireGuard Configuration:
Create a WireGuard configuration file (/etc/wireguard/wg0.conf). Replace <your_server_private_key> and <your_server_public_key> with your server's private and public keys:
sudo nano /etc/wireguard/wg0.conf
[Interface]
PrivateKey = <your_server_private_key>
Address = 10.0.0.1/24
ListenPort = 51820

[Peer]
PublicKey = <client1_public_key>
AllowedIPs = 10.0.0.2/32

[Peer]
PublicKey = <client2_public_key>
AllowedIPs = 10.0.0.3/32
1.4. Start WireGuard:
Enable and start the WireGuard service:
sudo systemctl enable wg-quick@wg0
sudo systemctl start wg-quick@wg0
Step 2: Automate WireGuard Configuration with Ansible
Automate the generation of WireGuard client configurations using Ansible. Create an Ansible playbook (e.g., generate_wg_config.yml) to generate client configurations:
2.1. Install Ansible:
If you haven't already, install Ansible on your local machine:
pip install ansible2.2. Create an Ansible Playbook:
Create the Ansible playbook:
---
- hosts: localhost
  tasks:
    - name: Generate WireGuard Key Pair
      command: wg genkey | tee {{ client_key }} | wg pubkey > {{ client_public_key }}
      with_items:
        - client1_key
        - client2_key
      delegate_to: localhost

    - name: Generate WireGuard Config
      template:
        src: templates/wireguard-client.conf.j2
        dest: /etc/wireguard/clients/{{ item.0 }}.conf
        owner: root
        group: root
        mode: '0600'
      with_nested:
        - ["client1", "10.0.0.2/32"]
        - ["client2", "10.0.0.3/32"]
      delegate_to: localhost
2.3. Create a Jinja2 Template:
Create a Jinja2 template (e.g., wireguard-client.conf.j2) for generating WireGuard client configuration files:
[Interface]
PrivateKey = {{ lookup('file', item.0 + '_key') }}
Address = {{ item.1 }}
DNS = 8.8.8.8  # Optional: Set your DNS server

[Peer]
PublicKey = {{ server_public_key }}
Endpoint = {{ server_public_ip }}:51820
AllowedIPs = 0.0.0.0/0
2.4. Run the Ansible Playbook:
Execute the Ansible playbook to generate client configurations:
ansible-playbook -i localhost, generate_wg_config.ymlStep 3: Configuring Nginx and UFW
Now, let's configure Nginx to allow access only to users connecting through the WireGuard VPN. UFW will be used for firewalling.
3.1. Install Nginx:
Install Nginx if it's not already installed:
sudo apt install nginx3.2. Create an Nginx Server Block:
Create an Nginx server block configuration for your application. Replace <your_application_config> with your actual Nginx configuration.
sudo nano /etc/nginx/sites-available/<your_application_config>server {
listen 80;
server_name your.domain.com;
location / {
deny all;
# Allow access only from WireGuard VPN IP range
allow 10.0.0.0/24;
allow 127.0.0.0/32;
deny all;
}
# Additional Nginx configuration for your application...
}
3.3. Enable the Nginx Server Block:
Enable the Nginx server block configuration by creating a symbolic link:
sudo ln -s /etc/nginx/sites-available/<your_application_config> /etc/nginx/sites-enabled/
3.5. Configure UFW:
Allow incoming connections from 10.0.0.0/24 and enable UFW:
sudo ufw allow from 10.0.0.0/24
sudo ufw enable
3.6. Test Nginx Configuration:
Before reloading Nginx, test the configuration to ensure there are no syntax errors:
sudo nginx -t
3.7. Reload Nginx:
Reload Nginx to apply the configuration changes:
sudo systemctl reload nginxFinal step : Configure Wireguard VPN client to access the private web apps.
Click here to Configuring WireGuard Clients on macOS, Linux, and Windows
Conclusion
You have successfully deployed WireGuard on a VPN server using Ansible for automated client configurations.
Additionally, Nginx and UFW have been configured to allow access only to users connecting through the WireGuard VPN.
This setup provides a secure and private way to access your web server and resources, enhancing the overall security of your infrastructure.
Be sure to maintain your server and WireGuard configurations while keeping security in mind at all times.